Sample Products Library Tutorial: Bicycle
About this tutorial
This tutorial is intended as a learning how to achieve certain outsomes with the configurator. Bicycle product sample is used as a framework for this and two different configurations for user are explained. Both use exactly the same assets (3D models and material files) and are different only in terms of how the product rules are defined.
Assumptions You have only single tenant access. If you have access to many tenants, this tutorial assumes you select one of your tenants where you will create the tutorial configuration. This tutorial flows from one step to another and will take a couple of hours from your time, mostly due to the fact that you are not familiar with any of the concepts and ways of doing in the configurator.
Tutorial workflow
- Create new product library for tutorial
- Copy the tutorial products to the new library
- Test and try changes and see effects of configuration
- Study and learn how the products are configured
- Delete product library
1. Create new product library for tutorial
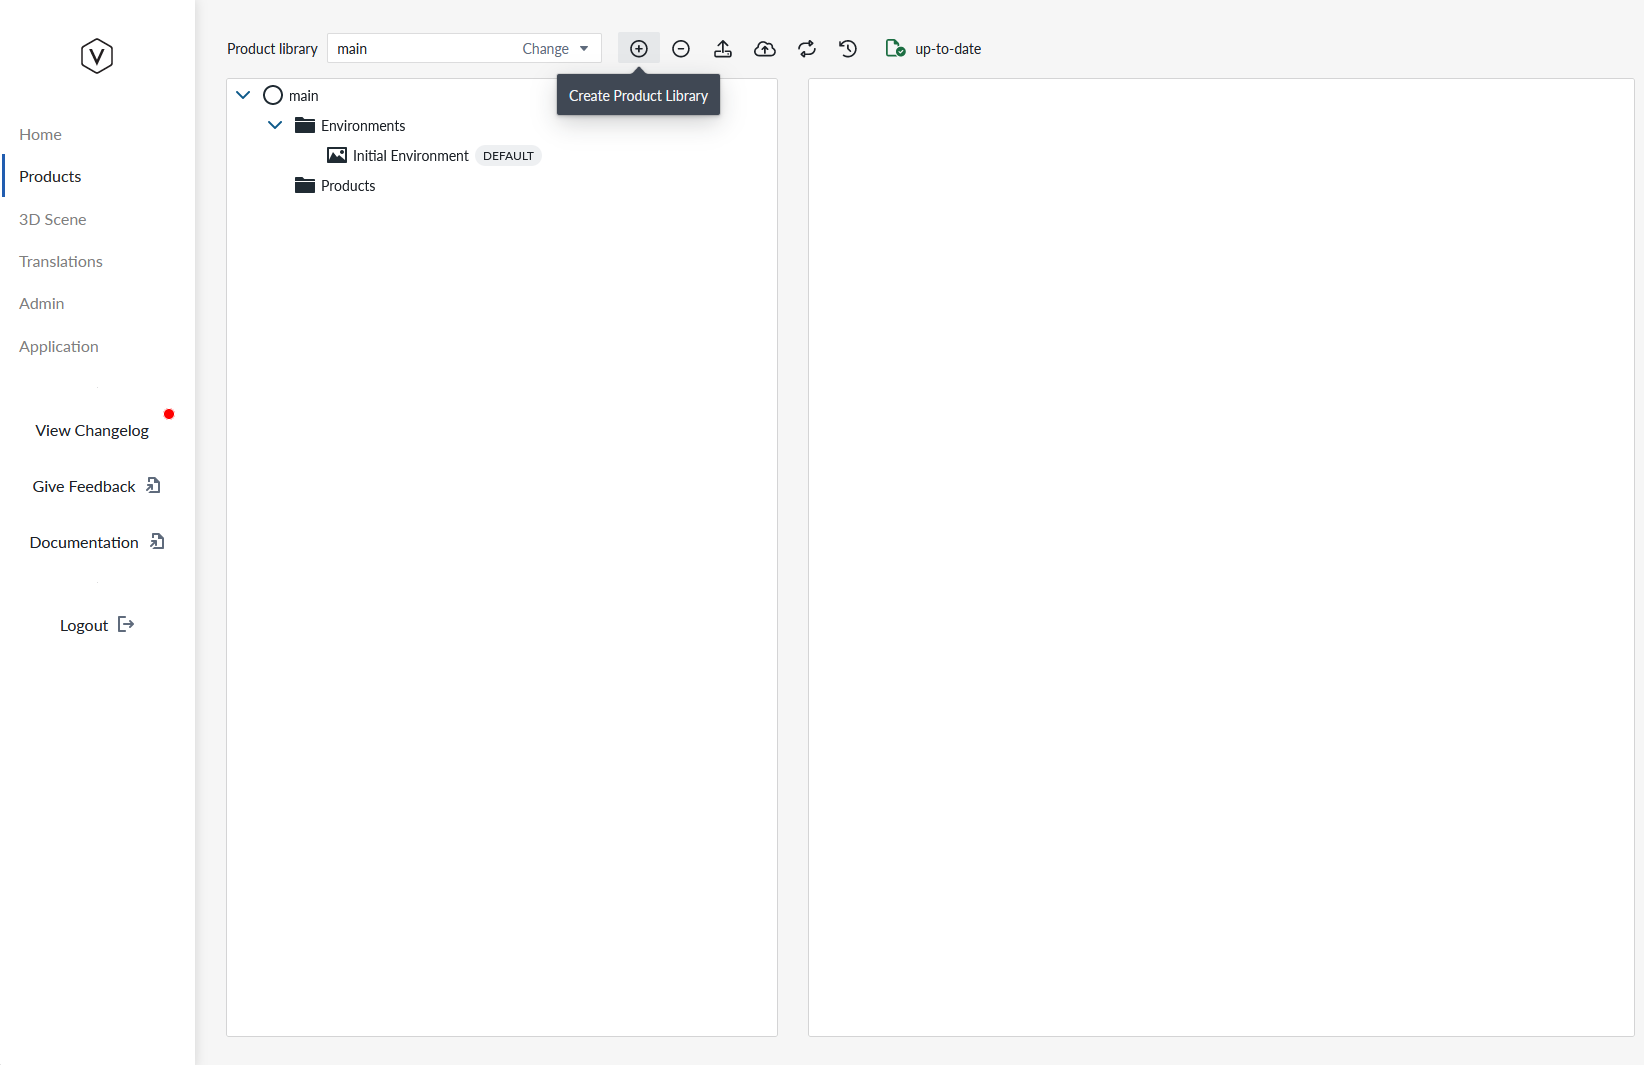
The first step for you is to create new product library and name it as "tutorial_bicycle". This is done in top menu bar by pressing the plus icon highlighted in picture below.
2. Copy the tutorial products to the new library
Second, import the bicycle sample product by hovering mouse over  "Products" folder and click 2nd mouse button to open context menu and import the Sample Bicycle product by moving mouse over the name and clicking on it
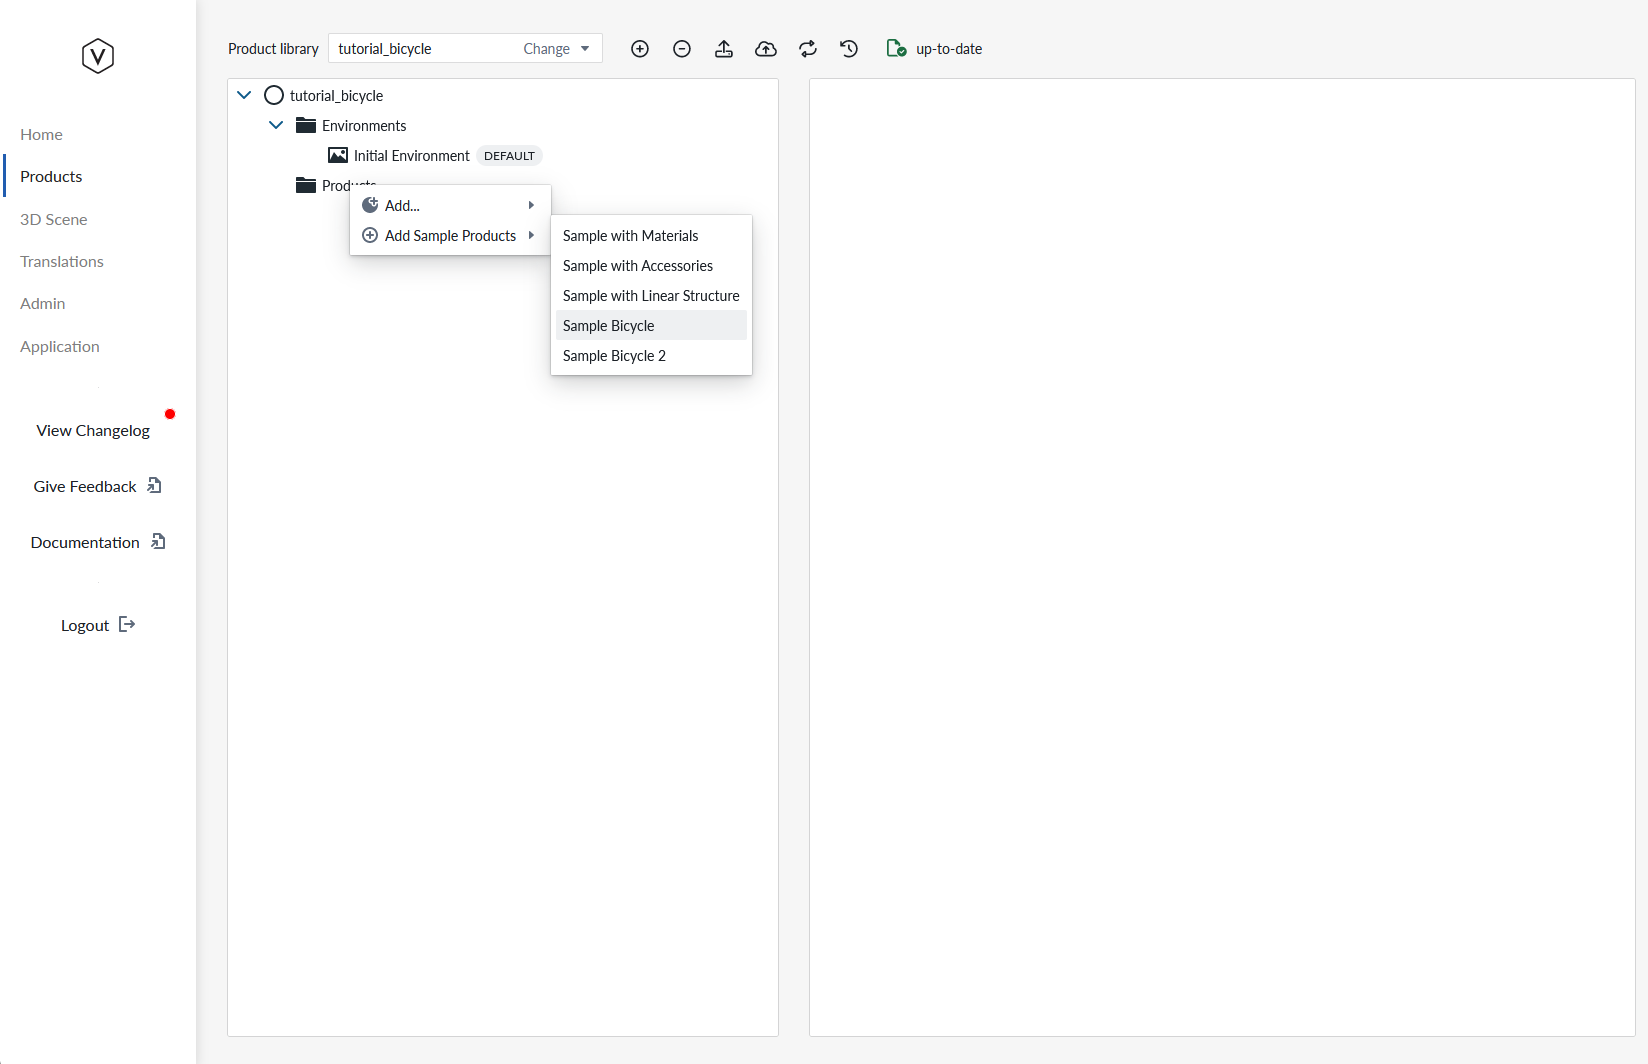
Repeat the import for "Sample Bicycle 2".
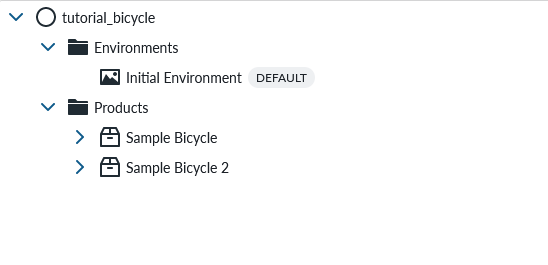
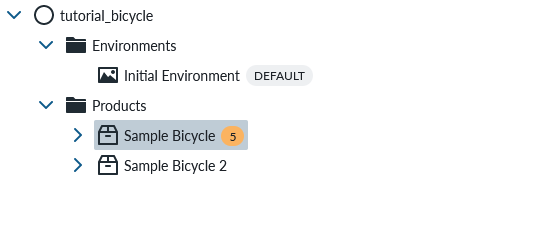
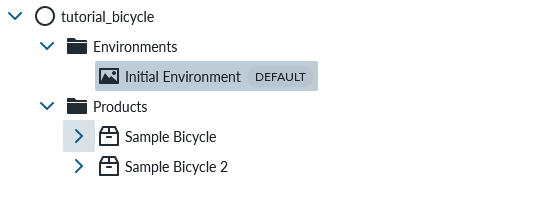
Your Product Tree view should look like this
3. Test and try changes and see effects of configuration
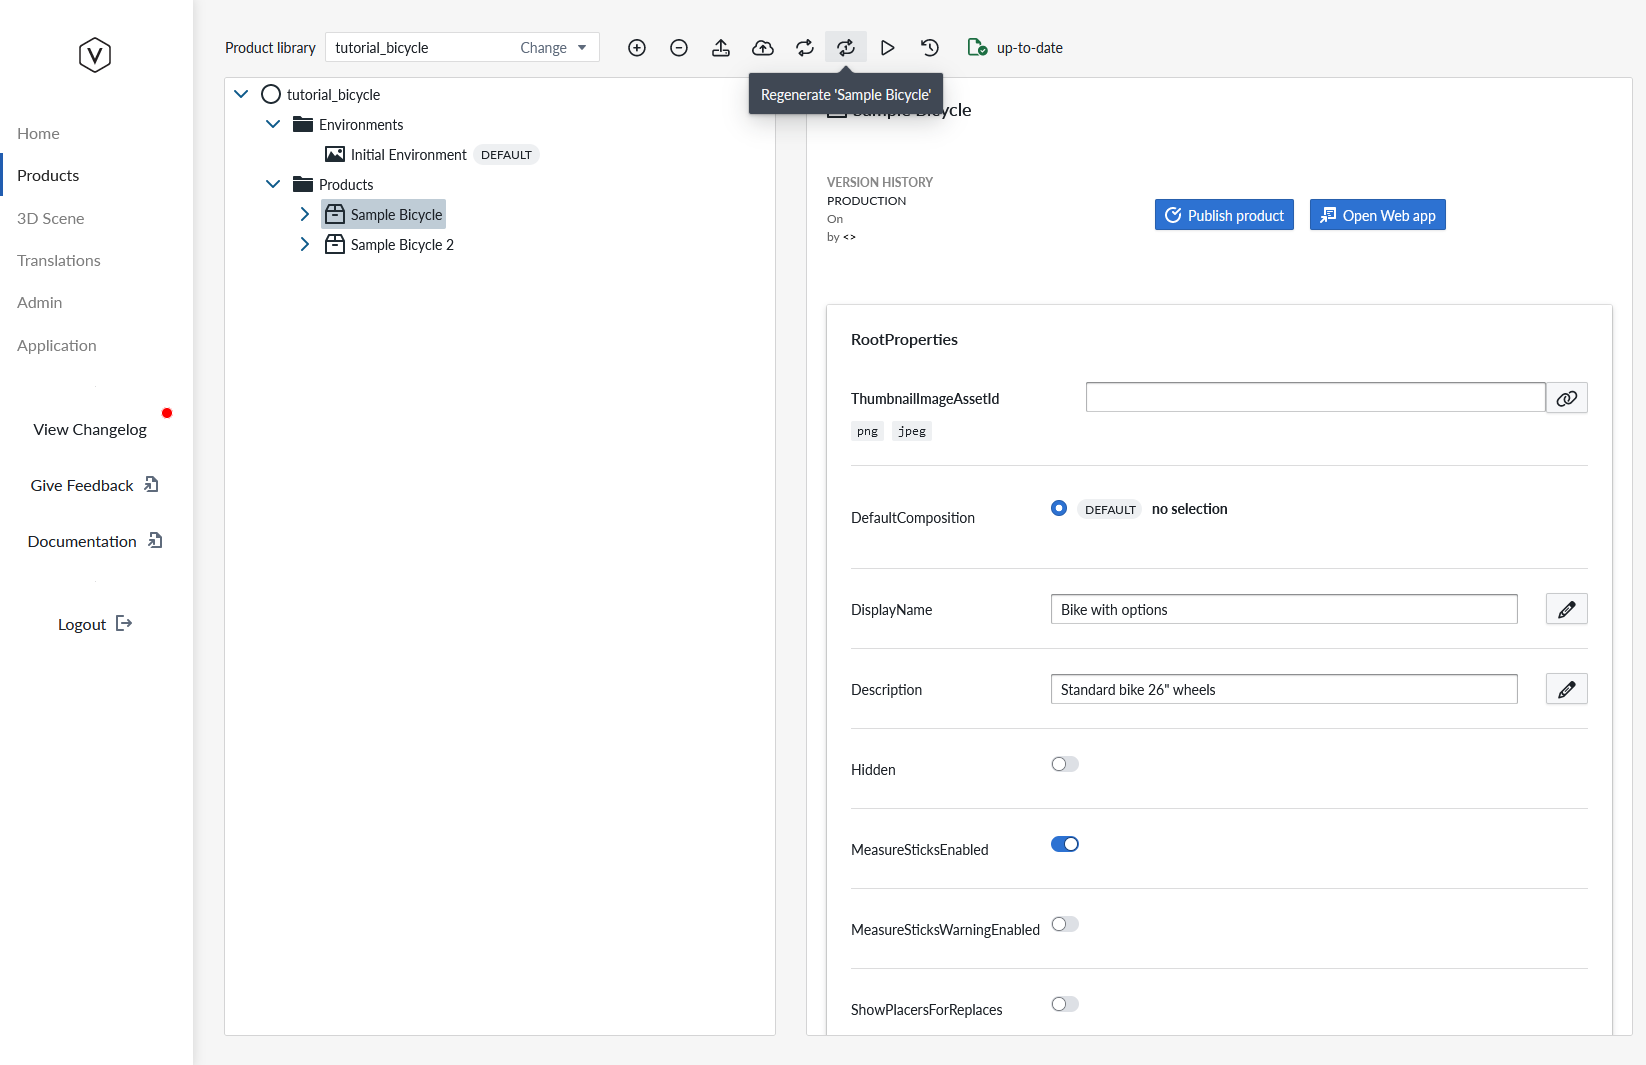
Study the "Sample Bicycle" product in planner 1st by selecting it by clicking on the name and then regenerating runtime products for this product only by selecting the correct button on the top menu. If you don't click on the product itself and select it, the button will not be present.
Your product tree will look like this after the regenerate is over
View the product in planner by clicking on the "View 'Sample Bicycle'" button which can be found in the top menu as highlighted in picture below:
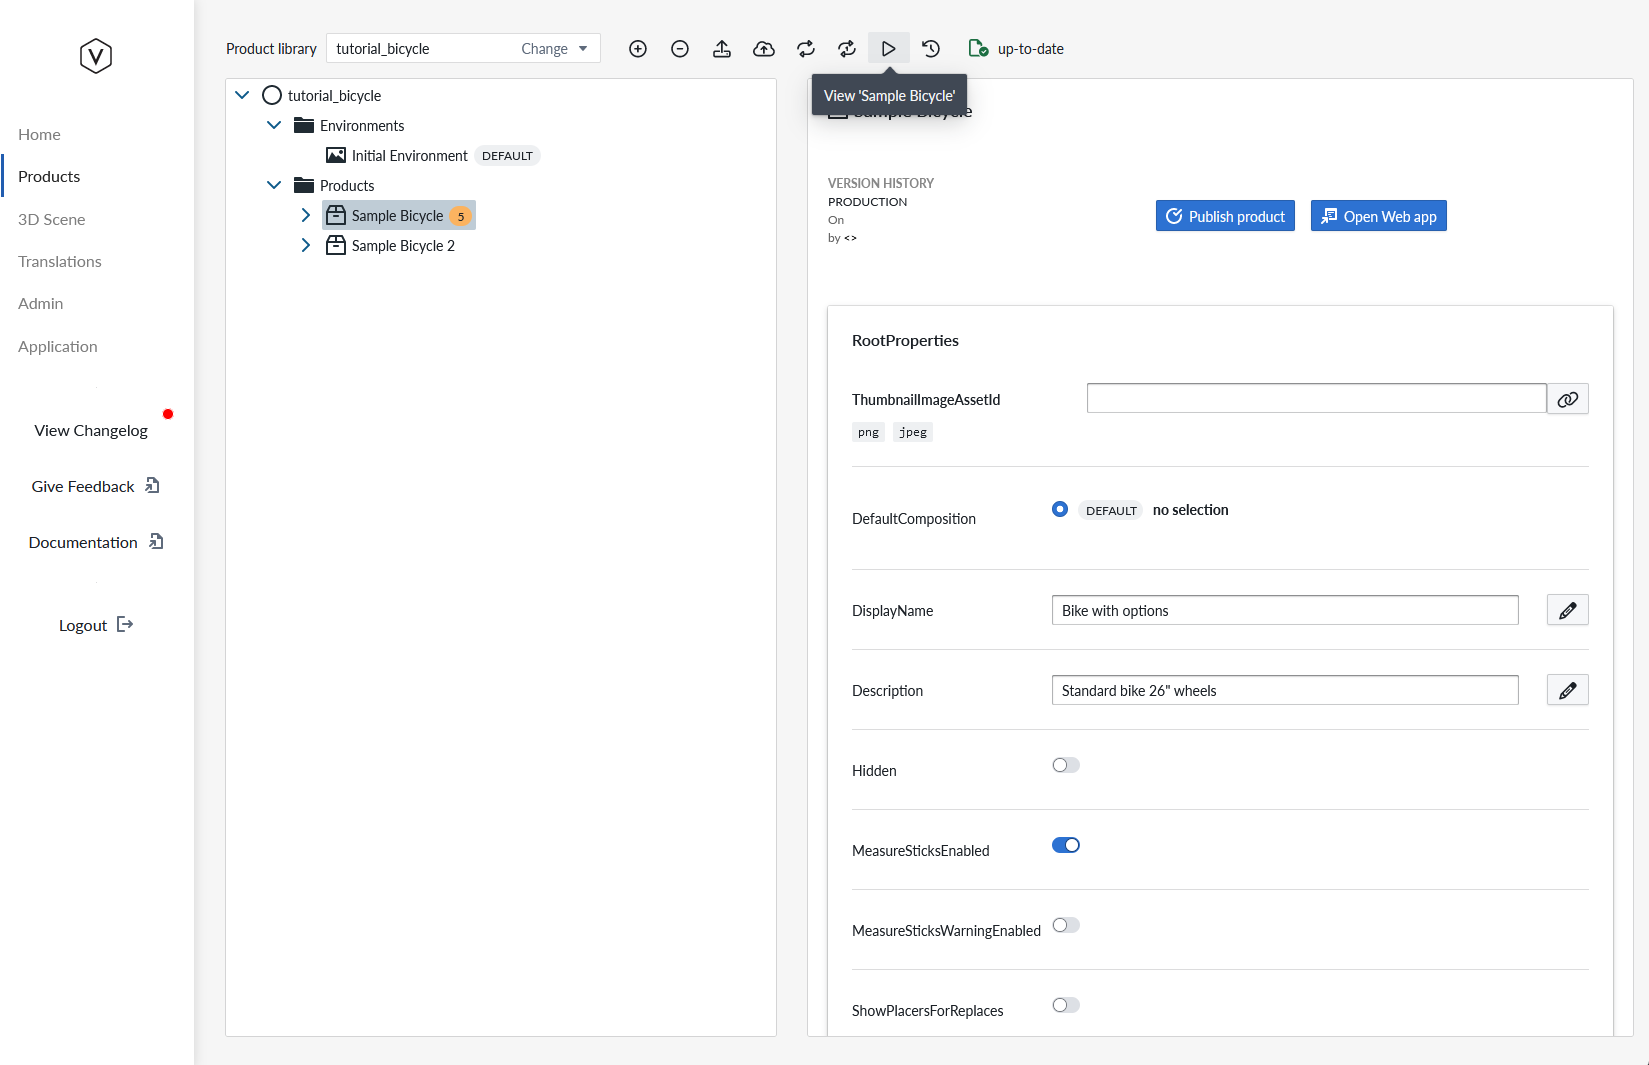
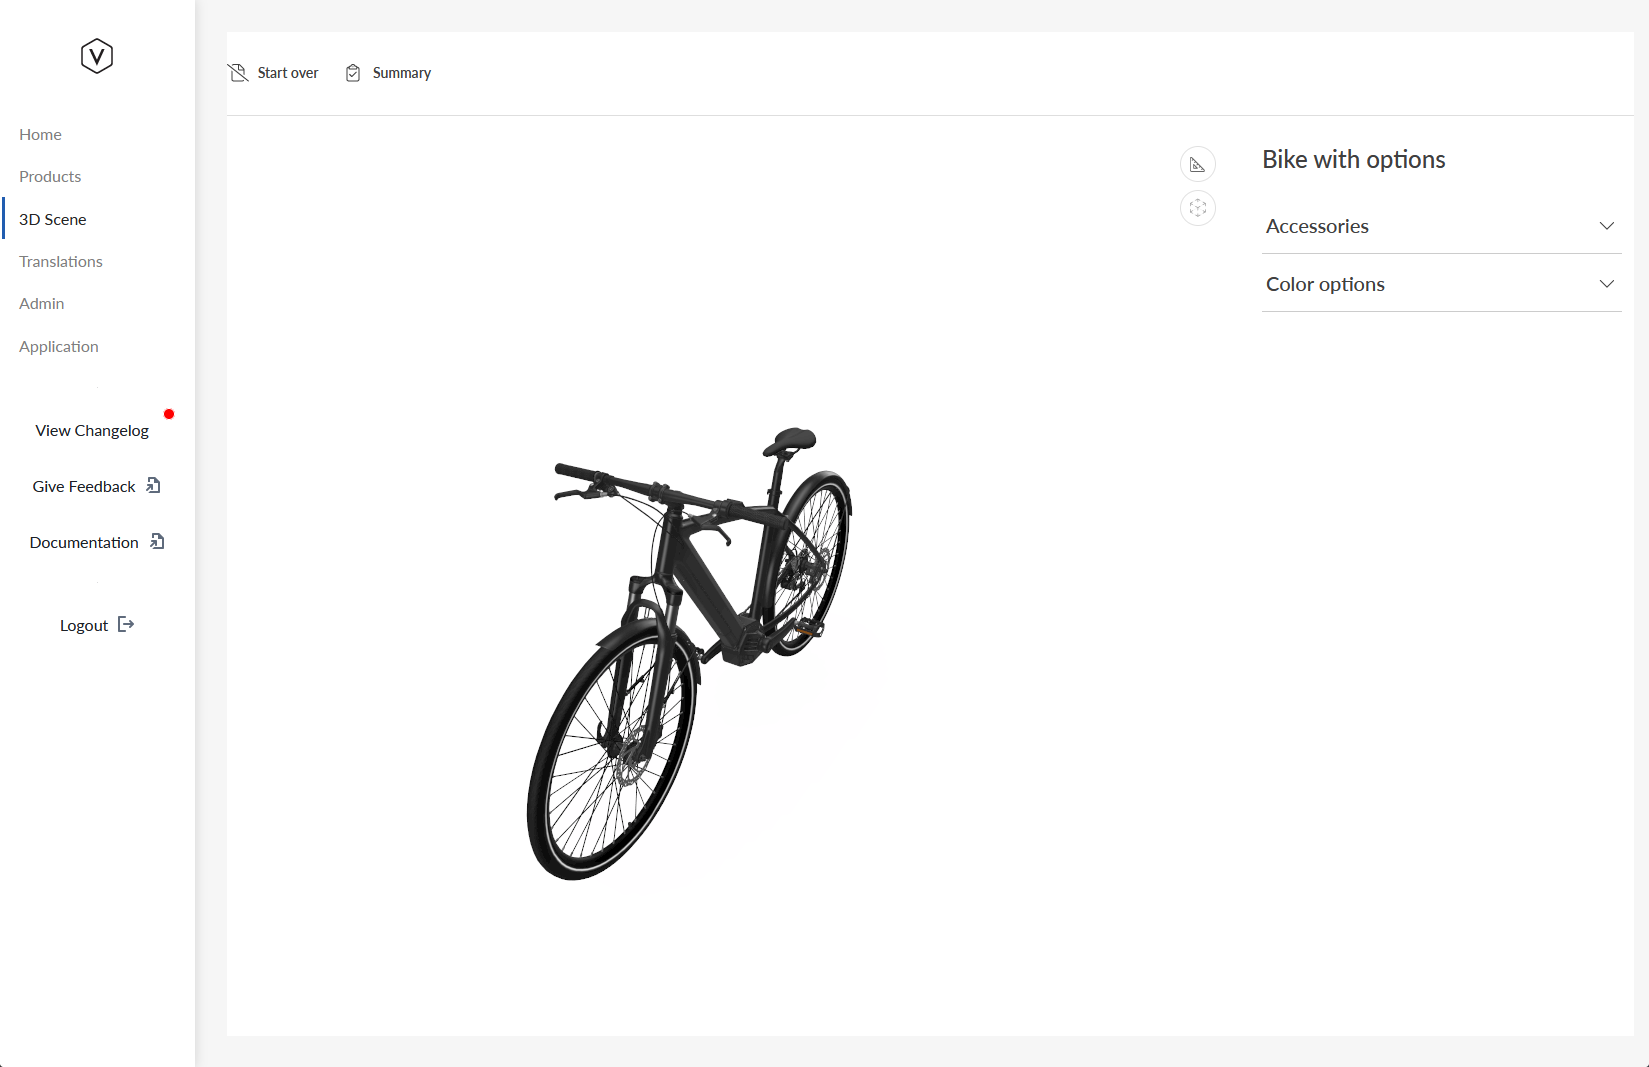
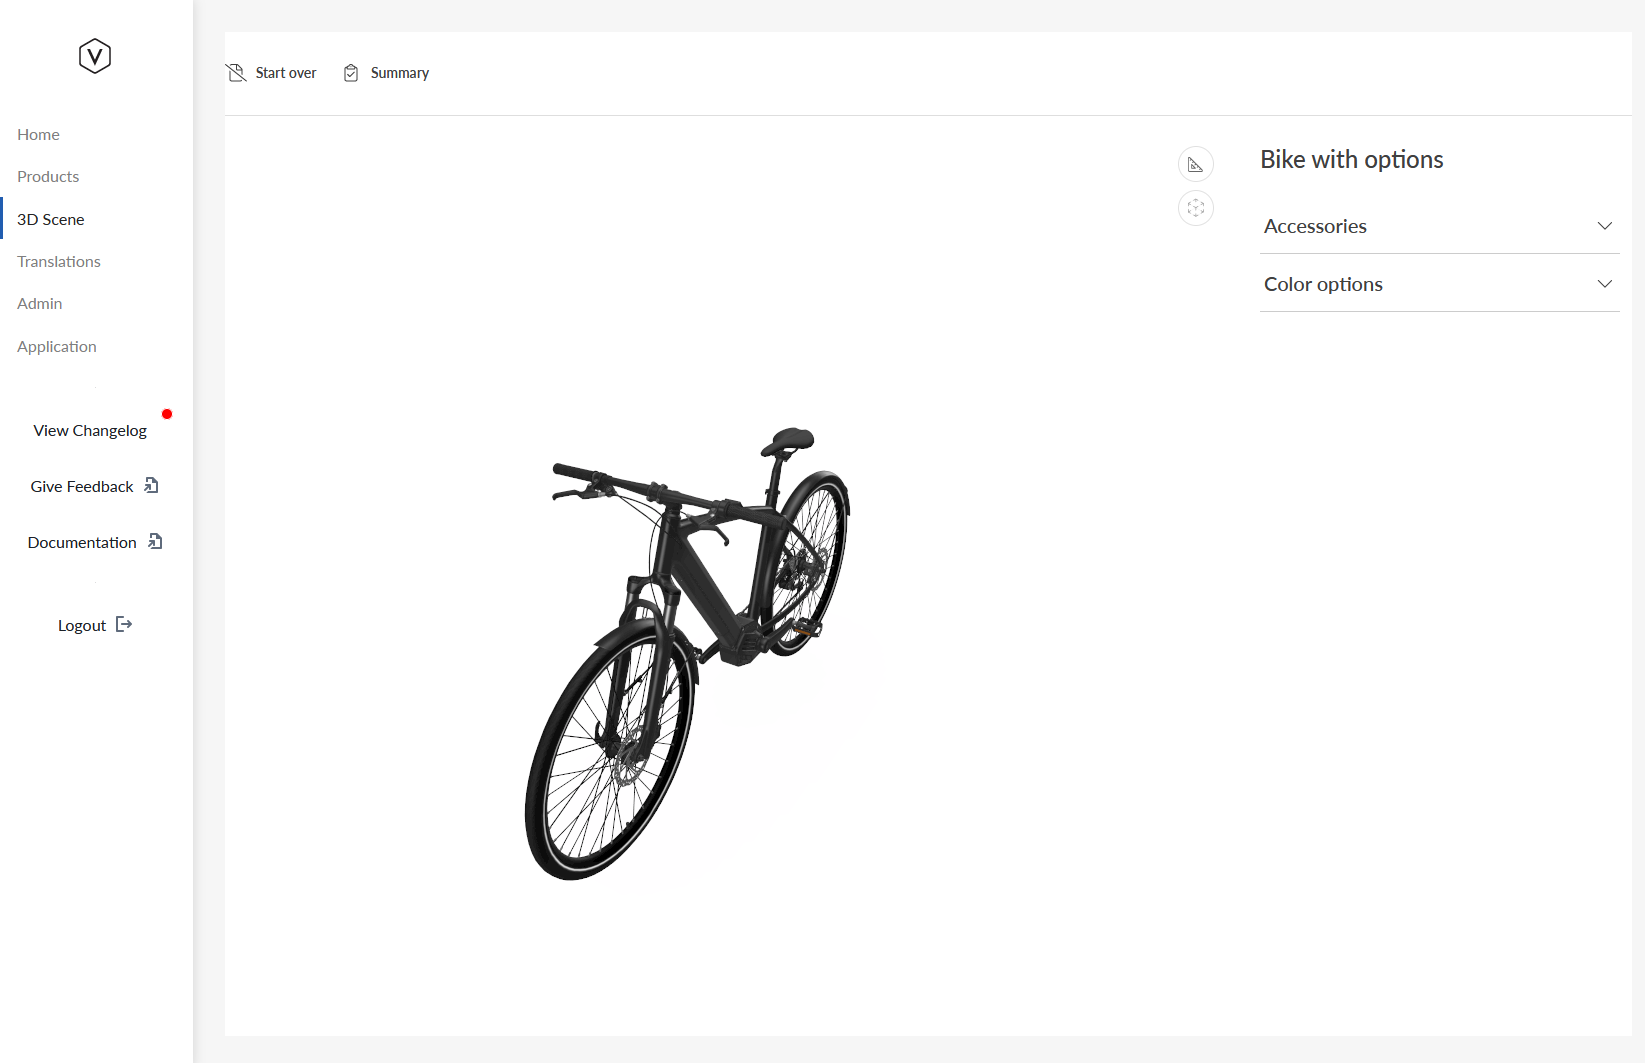
You will open the planner view inside the manager and your browser looks like this:
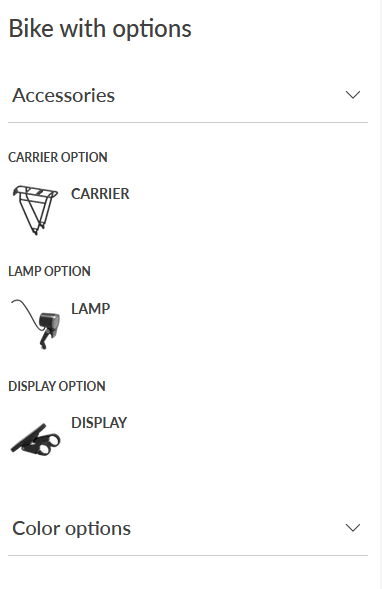
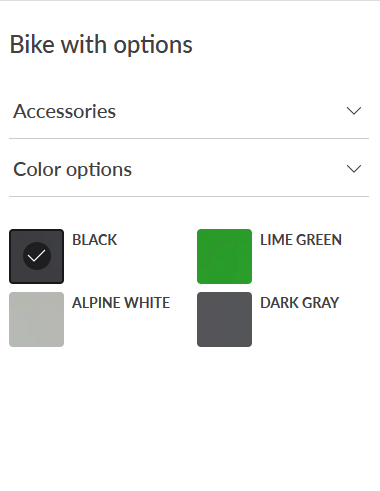
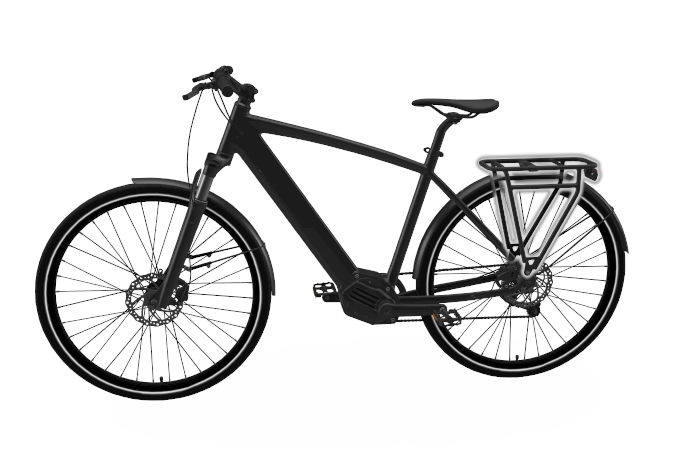
Open Accessories menu and add any or all of the possible accessories
Open Color Options menu and change the color selection. Notice how your accessories also change color as you selected.
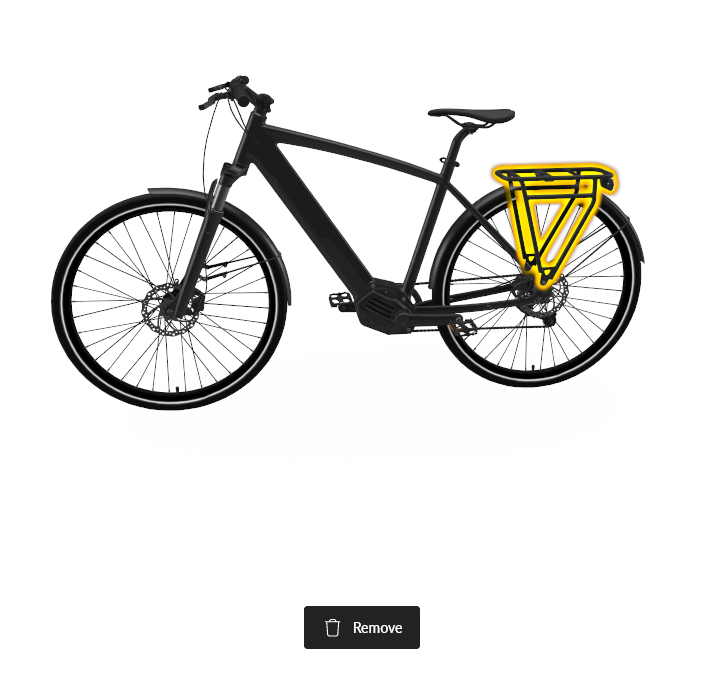
Note that you can remove any added accessory by selecting it on th 3D scene by clicking on it and then pressing the remove button that is shown. Below picture shows a highlight when you move mouse over an accessory.
Below picture shows selection box and remove button once you have clicked on an accessory.
After you've become familiar about this product, click back button on the browser until you return to manager view with the product tree.
Select "Sample Bicycle 2" product, regenerate the product and open viewer as instructed previously. Again, the regenerate will happen automatically when you open the viewer, but triggering it manually ahead of time helps you catch warnings before the viewer loads.
Your screen should look like this:
The Accessories and "Color Options" menus are bit different this time and you should play around with the options. Notice how color selection now is applied per accessory and also theres two color options for the bicycle body. Each of these material selections are independent of each other which is different to the 1st bicycle configuration.
Once you feel comfortable in understanding how the 2nd bicycle configuration works, click on back button on your browser until you are back in the product tree view.
4. Study and learn how the products are configured
Open the "Sample Bicycle" product by clicking on the arrowhead icon ![]() just left of the product name as shown in the picture:
just left of the product name as shown in the picture:
Hover mouse over the connector icon  of the "Carrier Option" item. The tooltip will label this connector as "Accessory Slot".
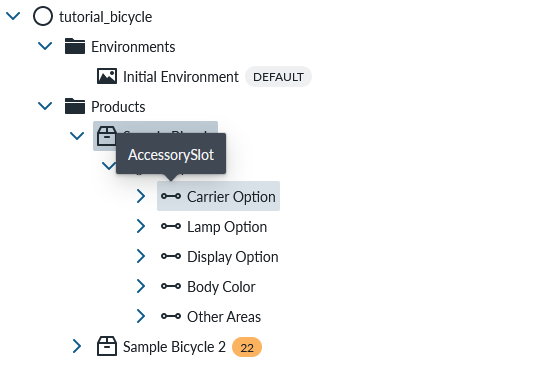
This means that the system will treat the underlying configuration as an accessory of the main part where the configuration is in.
Hover over the same icon on "Body Color" item. Tooltip now tells this is material slot and the system treats that the configuration inside here contains material files for the bike body. 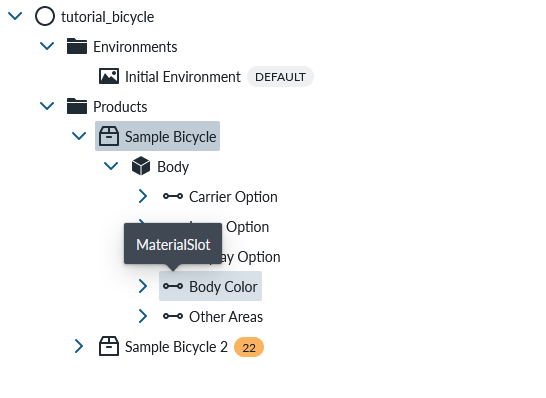
Open the "Body Color" item by clicking on the arrowhead icon. Open the "Color Options" folder (ItemList) by clicking the arrowhead. Your product tree should look like this 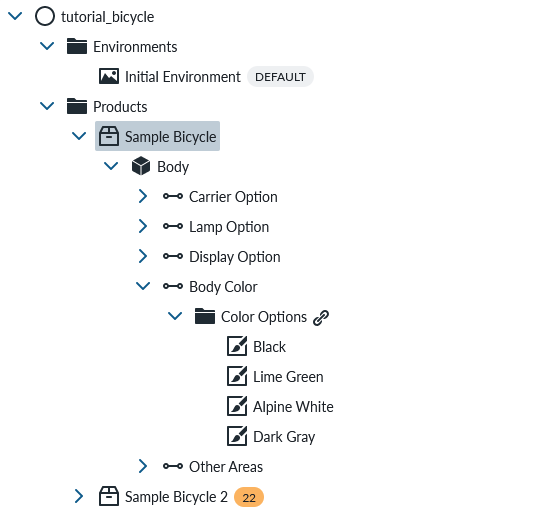
Now open the "Sample Bicycle 2" product similarily than "Sample Bicycle", the tree should look like below
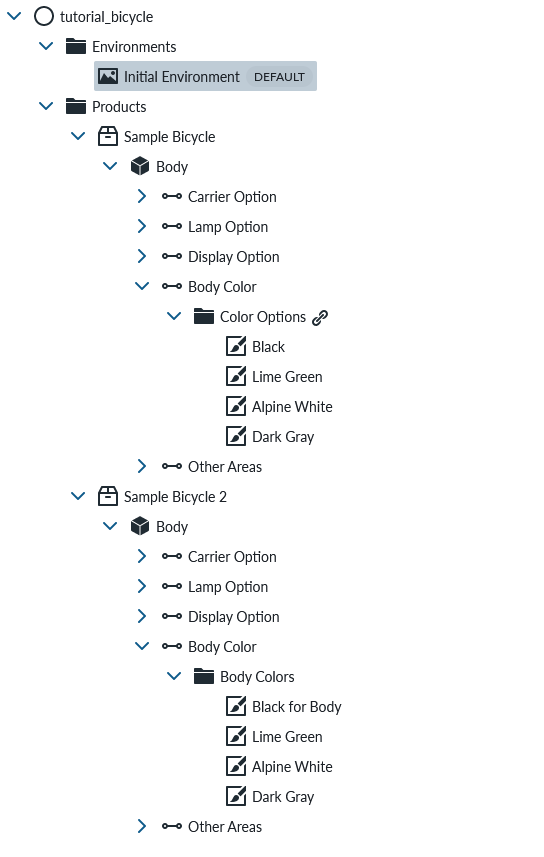
Can you spot one difference in the configuration of materials?
The Sample Bicycle Color Options ItemList has a symbol attached in it. This symbol is "a link" meaning that the ItemList is a shared asset (copy-as-a-reference) which allows convenience of sharing same materials to many parts. The concequence is that each material slot will automatically detect that the asset is a shared one and when user selects that specific material, all material slots with the same configuration will automatically select the same material. The materials in the 2nd product are not copied as reference (no link symbol) which means that the materials are independently selectable by the user. Additionally, the material selection is made easy for the user by placing the materials in the same cateogry of the menu using the product library category editor.
Exploring 3D model material slots
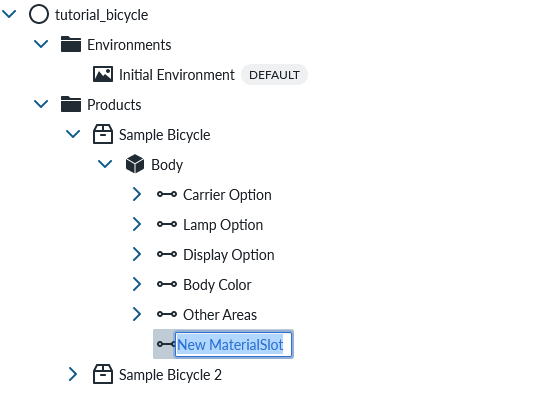
The bicycle product has also many material slots defined in the 3D model. We can explore these by creating a new material slot by hovering over the body part and clicking 2nd mouse button to opening the context menu and selecting "add..." and then "material slot" and optionally naming it to something other than default. Below image shows an example:
The material slot properties have an element for material areas linked to the slot and default is "all material areas", but clicking on the field opens a browser for analysing the material areas. Below picture shows the beginning of the list and clicking on one row, selects that material area instead of all for this material slot.
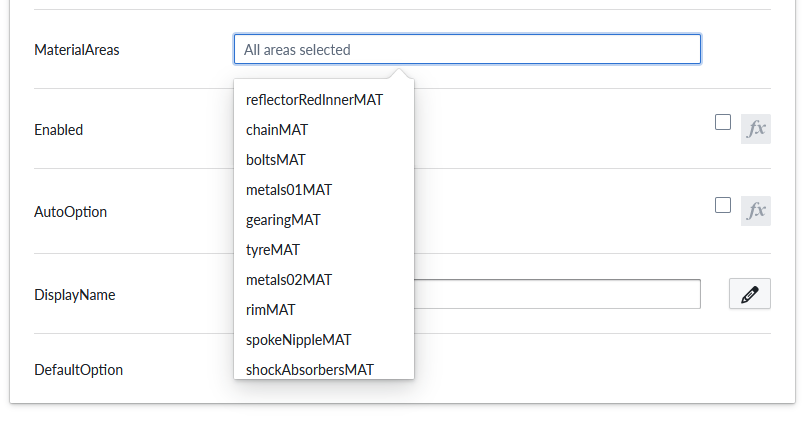
You can explore these by selecting one material area or a few for this slot. Note that there are two slots already and you have to check that your selections are unique as the tool does not yet know which slots are already selected. Copy-paste material itemlist from any other material area and experiment the effects yourself.
5. Delete product library
Once you have completed the tutorial, you should delete the product library by clicking the remove product library button on top menu bar.

Then you must type inthe name of the product library into the confirmation box.
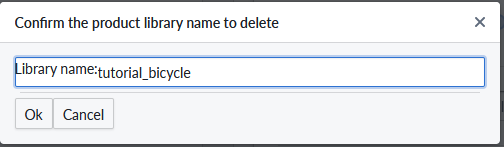
It takes a bit of time for the system to delete the library.